3D Stereogram of a GeoTrax Scene
GeoTricks - Geo-3D!
3D Stereogram of a GeoTrax Scene
Introduction
"3D Stereograms," can be made from photos of any 3
dimensional scene, but I find the technique to be especially well suited for
displaying GeoTrax scenes.
What are 3D Stereograms? They are basically composed of two images taken from slightly different perspectives that when viewed, appears in 3D.
As for viewing Stereograms, I'll direct you to this page with instructions: http://www.stereograms.net/optical-illusion-theory.html
Everything you need to Know to Create Stereograms
First of all, you will need a program capable of editing photos.
I suggest irfanview (it will be used in this demonstration).
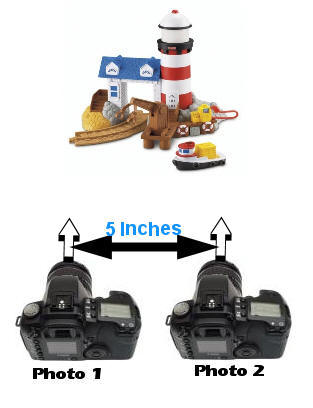
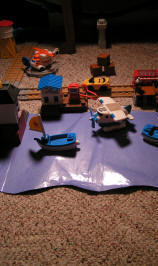
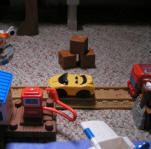
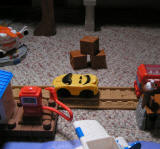
Step 1: Take two photographs of the same scene approximately 5 inches apart. (With the camera facing
Step 2: Resize
the images to approximately 200 pixels wide (maintaining the original aspect
ratio)
In Irfanview, this is done by Hitting CTRL+R then enter "200" in the "Width"
section of "Set New Size" and be sure the "preserve aspect ratio" checkbox is
checked below.
Step 3: Notice that Photo 1 may contain a little
more content on the left side of the image and Photo 2 may contain a little more
on the right side of the image (in yellow below). If this is the case,
crop both photos so that they contain identical content. (In Irfanview,
this is done by drawing a box over the part of the image you want to keep, then
selecting "Edit" -> "Crop Selection."
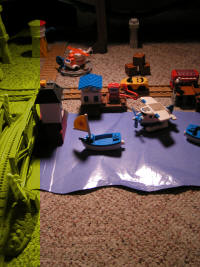
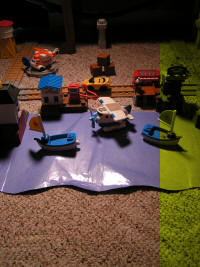
Yellow Area = Extra Content that needs to be cropped off
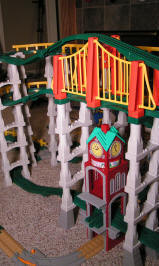
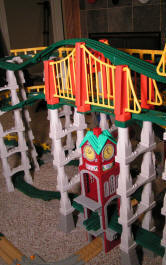
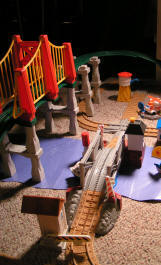
You should now have two images that if printed/displayed side by side can be viewed in 3D!
Examples
(move closer or farther from the screen if you have trouble viewing these)

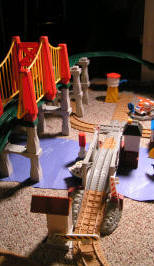
A "Wiggled" GeoTrax image...